
Thanksgiving has come and gone. We enjoyed the turkey, had our food comas or “naps” as that one uncle calls them. So now that means it’s officially Christmas time, right?
Alright… alright, I’ll at least let you finish your pumpkin pie first… Done? Okay great!
I don’t know about the rest of you all, but this year seems like one that needs a little extra spirit and holiday cheer, so I’m starting to celebrate the season early. I’m also hoping Black Friday is a thing of the past because I enjoyed being able to properly digest my food without being whisked away out the door to the nearest Target to stand in the -30 degree cold.
This year, we’ve already put up the tree, and as you read this, I’m most likely hanging up an ornament. Hopefully accompanied by the tunes of Bing Crosby's "Mele Kalikimaka", and a cup of coffee or what the hell, maybe some hot cocoa! Speaking of decorating trees… what if there was a way to put the joy of a Christmas tree with all of it’s ornaments, lights and Christmas magic into a bite-sized dessert? Well guess what, you can! And that’s exactly what I’m going to show you how to make today.
Yes, I am going to show you how to make another cake pop. You might as well start calling me the crazy cake pop lady at this point. But hey, that’s better than crazy cat lady, so I’ll take it. Here’s the thing, I love cake pops so much because they are super versatile and you can be extremely creative with them. You can pretty much make them into whatever your little heart desires. And it’s 2020, and what is better for socially distanced holiday celebrations than an individual cake ball on a stick? It really is the ideal treat.
12 Days of Christmas Desserts
Also, I’m sure you’re wondering what this “12 Days of Christmas Desserts” is. Well folks, it means exactly what it says. I have challenged myself to the very lofty goal of curating 12 Holiday themed desserts for you and your loved ones to dabble in and graze over this season. I will be spreading out their release like a sporadic advent calendar in the days leading up to Christmas. And I really hope you also share them with your friends because I’ve already said “Christmas” so many times in this post that I’m sure the SEO (search engine optimization) is not going to work in my favor at this point. Regardless, it’s going to be a very fun time so I sure hope you follow along. I hear if you do, you get put on Santa’s nice list!!
If this is your first go at making cake in the pop form, make sure to check out my previous post and video tutorial on how to make basic cake pops. It’s super simple and the main things you are going to need are:
- a 9 x 13 pan of cake
- Buttercream frosting
- Candy melts
- Cake pop sticks
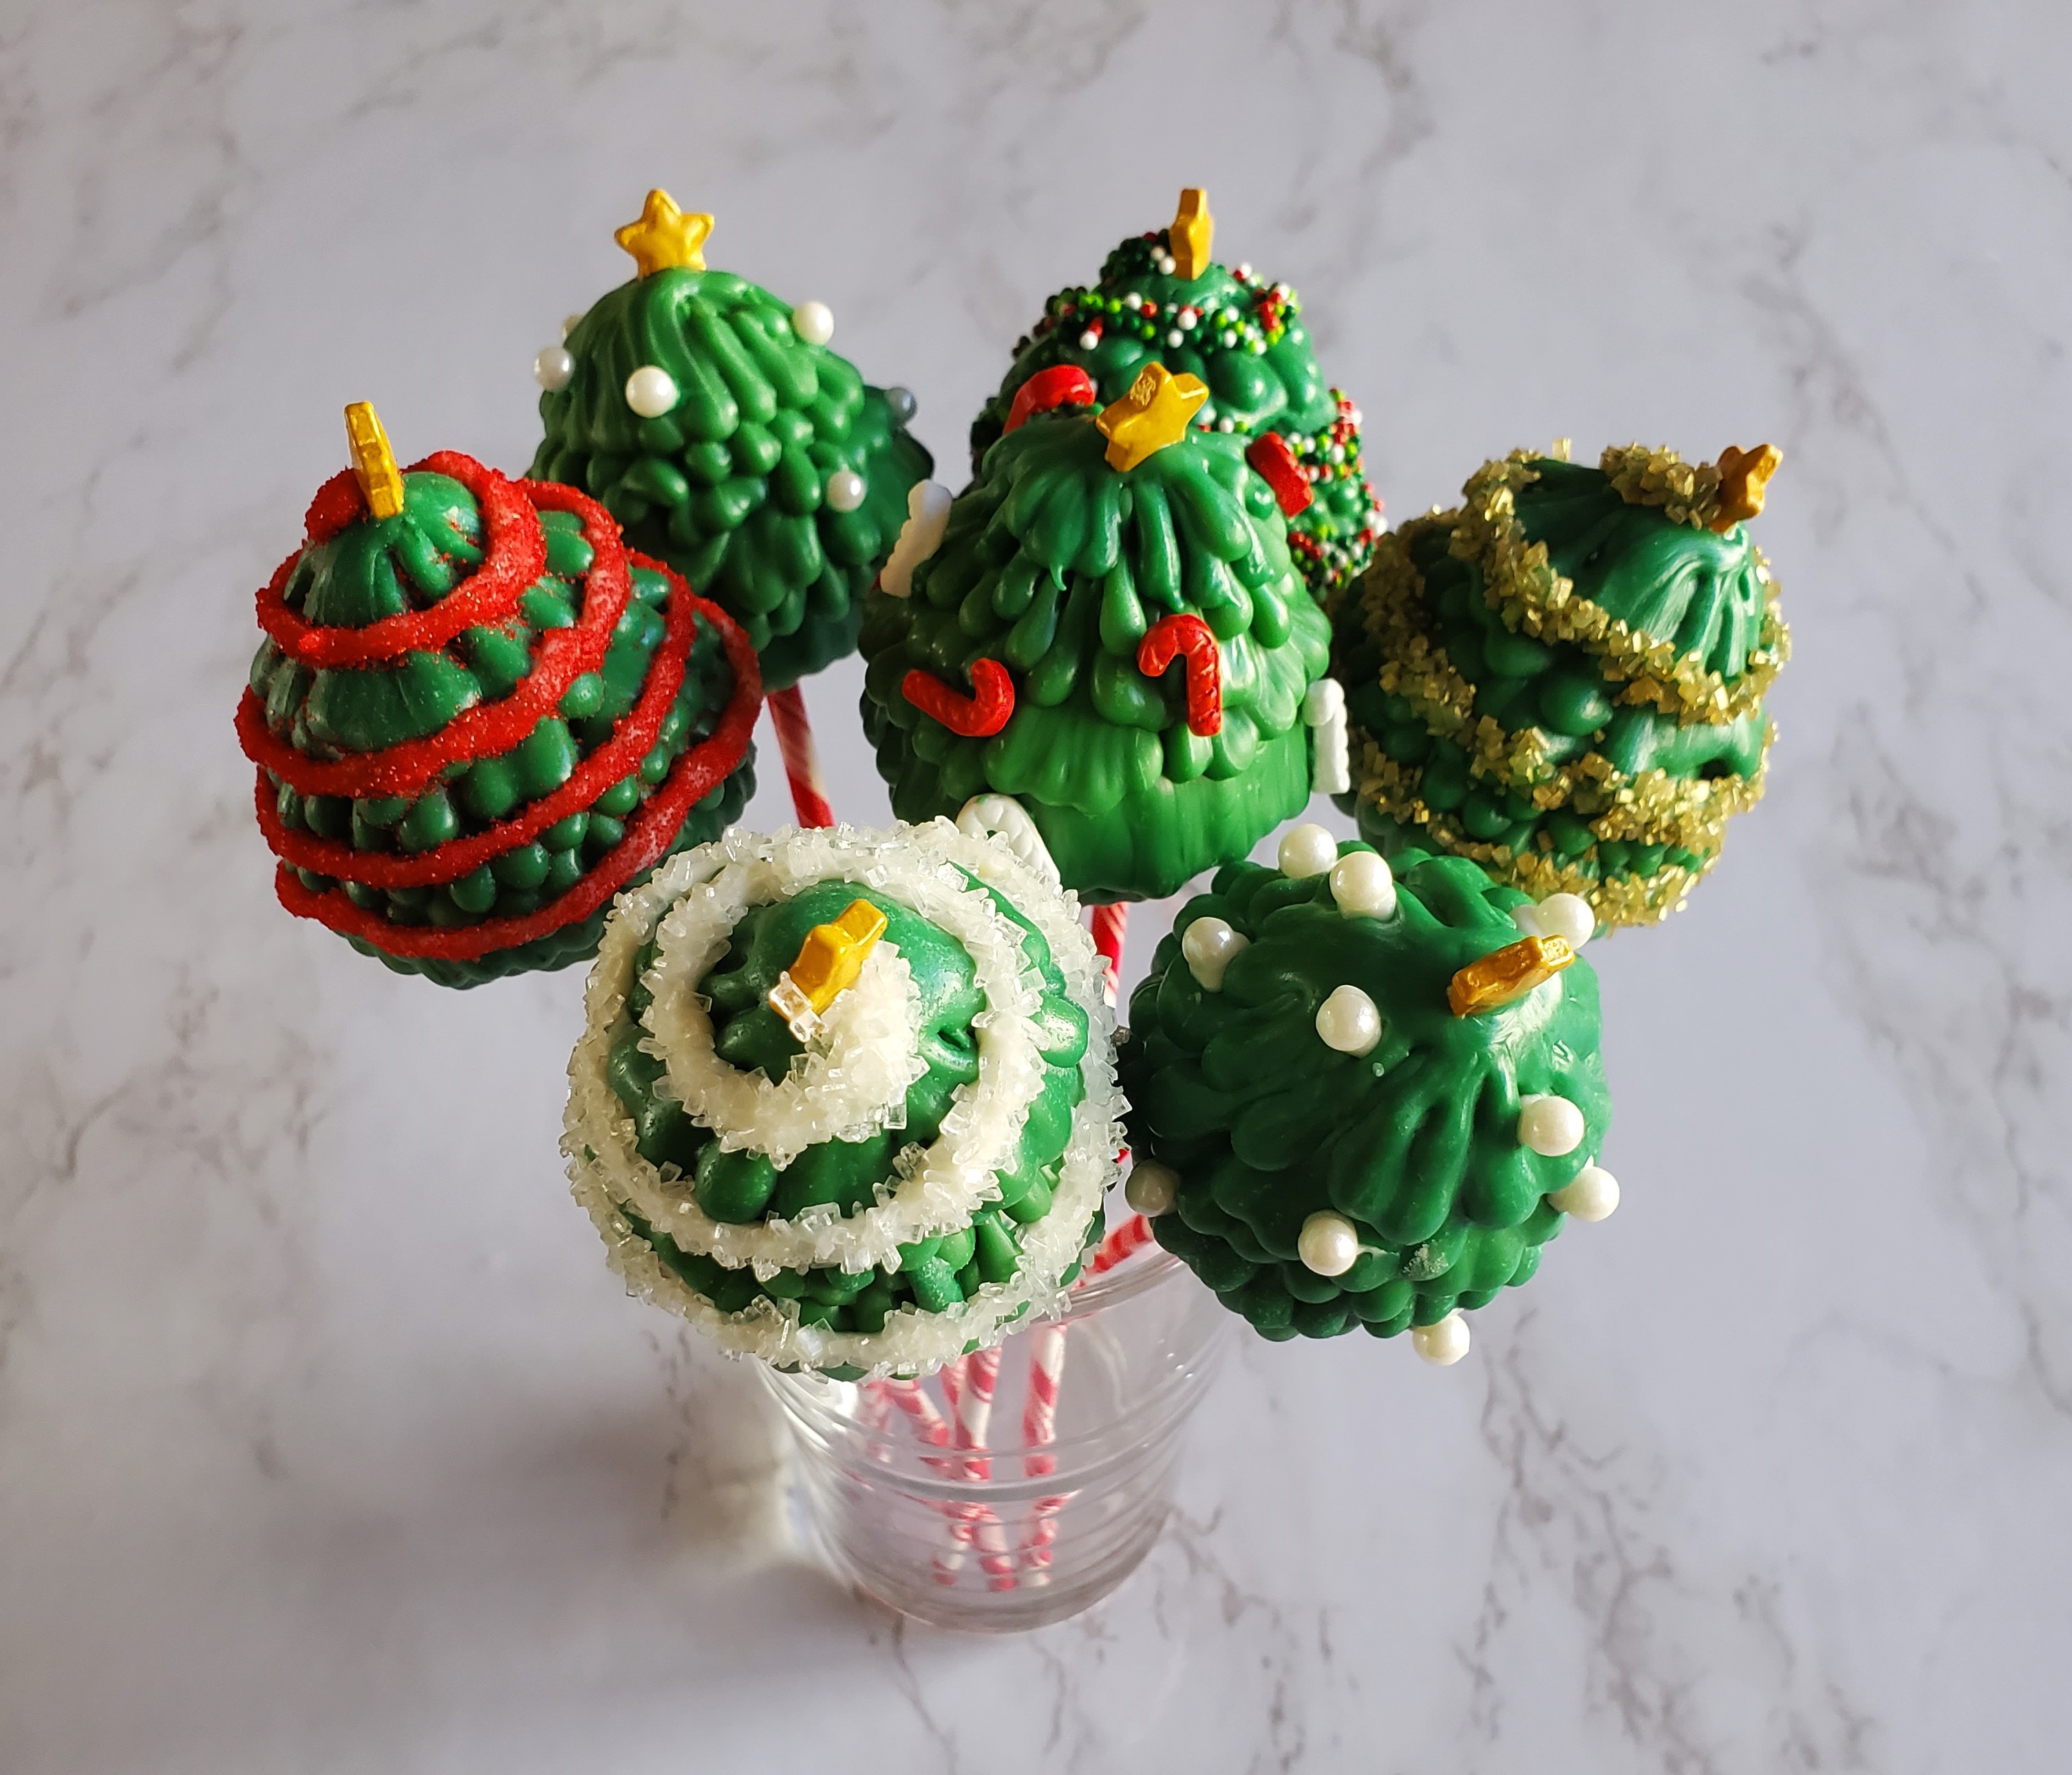
If you have all of these ingredients/materials, you’re going to do just fine. If you don’t, I made a list with links for you below, you’re welcome! However, for these specific cake pops, you’re going to want green candy melts. You’ll also want some sprinkles for decorating your mini trees. The main differences when specifically making Christmas tree cake pops, has to do with the shaping of them and the application of candy melts after your first dip. Essentially, you are going to follow all of the same directions of the basic cake pop tutorial right up until the end of rolling your cake balls. After you have rolled them, you are then going to shape them into a triangular-cone shape, like a tree. Then you are of course going to follow along in my detailed steps below, up until right after the first dip. After you have dipped all of your pops, you are then going to need a piping bag and #4 Wilton tip. Or a comparable small round piping tip. At that point, you will put your leftover candy melts into the piping bag (fitted with your tip). Then you are simply going to pipe little teardrops around the base of your tree and all the way to the top. You should begin your teardrop stroke at the base of the tree and pull up. I also strongly recommend letting your pop dry on a cake pop stand in between each layer around. I say this because there was definitely a time I got excited, wanting to layer very quickly, and all of the candy melts just slid right off. Don’t make the mistakes I did, lol.
These Christmas tree cake pops are just so adorable and I guarantee they will bring you and your loved ones holiday cheer. They’re going to be so beautiful; you won’t want to eat them. But I’m sure there’s that one person in your household that will eat them, even when you tell them not to. Sometimes we need that person. Because even though food is beautiful and can be art, it is meant to be eaten and enjoyed! I hope this recipe/guide/tutorial kicks off your holiday season with some pizazz. And I’m always here to answer your questions, so please leave a comment or reach out on social media! And please, don’t forget to share my posts/videos with your friends and subscribe to my YouTube Channel, it really helps more than you know, and I am SO appreciative to those of you who already have!
happy eating!
Lauren
List of Essentials as an Amazon Associate, I earn from qualifying purchases
How To Make Christmas Tree Cake Pops
I highly recommend you skip this part and watch my YouTube tutorial, but if you’re the type who likes to read, here you are!
- Bake a 9 x 13 pan of cake (any flavor). Let it cool, cut it up and crumble it very finely in a large bowl.
- Make some buttercream or buy some from the store and add to your crumbled cake. You want to mix in just enough frosting so that your mixture feels like Play-Doh. It is better to start with less rather than more or your cake pops with be to malleable.
- Roll your cake mixture into individual, bite-sized balls.
- Shape your balls into a triangular-cone shape, making sure to flatten the bottom.
- Melt down a bag of green candy melts. Use a candy melter if you have one, or microwave at 30 second increments stirring in between until smooth.
- Dip about 1 cm of the cake pop stick into the candy melts and then stick it into your cake triangle. Smooth the excess out around the base of the stick. Refrigerate your pops for 15 minutes.
- After your cake pops have set in the refrigerator, you are going to completely submerge your cake pop in the candy melts. Be careful not to jerk it around too fast or the cake could fall of the stick or get crumbs in your candy melts.
- Cover all of your cake triangle and allow this first layer of candy melts to harden.
- Fit your piping bag with a #4 Wilton tip (or other small round piping tip). Fill the piping bag with excess green candy melts.
- Pipe small teardrops all around the base of your cake triangle, starting to pipe at the bottom and pulling upward. Let each layer harden and then continue all the way up to the top.
- On your last layer, immediately add a star sprinkle at the top.
- Let your cake pop set again.
- Optional: Take your piping bag and pipe candy melts to wrap around your cake triangle. Then immediately shake on sprinkles of your choosing to create the look of garland or lights.
- Then place again on your cake pop stand to dry. Enjoy!
Comments