
Wowza. Nothing was spookier than that blizzard the other day! Am I right Minnesota? Or should I say Minne-SNOW-ta?! HA. Ha. Never heard that one before… Word on the street is we’re in for another one today! If that’s the case, then I hope you popped into the store to grab my list of ingredients/supplies (see below) because my Halloween Cake Pop video tutorial went live today! So, grab your cocoa and some fuzzy socks for a day of spooky baking! And if you’re somewhere warm, good for you! Try to pretend you’re cold.
I don’t post a ton of cake related videos/recipes because, well, I have a cake business and I want you to still buy things from me. Lol. But I felt like giving you all a real treat. See what I did there? Now if you’re thinking these are going to taste like the Starbucks cake pops. Thing again. These cake pops are going to taste 1000% better. Why? Because they’re homemade, and everything from scratch is better. And, not to harp on Starbucks, but I worked there for a while and in my opinion, their cake pops are:
- Not so cute
- Overly sweet
- Taste artificial
I can only guarantee that we will for sure fix #2 and #3 (especially if you don’t used a boxed cake mix). However, the “not so cute” part will depend on your artistic abilities. May the odds be ever in your favor.
What makes me an expert on cake pops? Well I’m highly certified from the University of YouTube. Never heard of it? Don’t worry about it! In all seriousness, I have been making these cake pops since I started Peace of Cake allllll… the way back in 2010, so yes, I have literally been making these for 10 years. And yes, I started my business as a 15 year old. I make my cake pops the way Bakerella makes them. If you don’t know who Bakerella is, she is the inventor of cake pops. There are many people who claim to be the creator, but I find Bakerella’s story to be the most credible, and backed by pure skill. She has several published books, many of which I own and highly recommend. Even though I learned from the master (‘s YouTube Channel), here are some tips I wish someone had told me when I started out.
Cake Pop Consistency
Make sure when you crumble your cake, that it is super finely crumbled, large chunks of cake will make undesirable cake pops that are hard to form. Use a buttercream frosting. If you use a Crisco or artificial based frosting, your pops will not firm up in the fridge. I also do not recommend using cream cheese frosting because it simply will not hold up.
Perfecting Your Candy Melts
Freshly bought candy melts will melt down the best. If you’re using older ones and they are still stiff after melting, add a little bit of coconut oil to thin it out. Never use water to thin out your candy melts! They do not mix. Also do not use a water-based food coloring if you need to change the color of your candy melts. Looks for an oil-based food coloring. Wilton also sells a food coloring set specifically for candy melts. I also highly recommend buying the Wilton Candy Melting Pop if you plan on making more cake pops in the future. Like I mention in the video, I own two and they are worth their weight in gold. I’m actually considering buying more for bigger projects, but I have no room – so please talk me out of it. But honestly, they are a great deal on Amazon, or wait until you get your 40% off coupon for Michaels and get it there!!
Essential Supplies
You have to get the sticks that I have linked below. When I was younger my dad accidently ordered some skinnier ones from Amazon because they were super cheap. The cake pops went all cattywampus and they didn’t even fit in the standard sized hole of my cake pop stand. Speaking of cake pop stands, you also need one of those! I don’t care if you’re not going to display them for a party. If you don’t want to hold each individual cake pop in your hand while it dries, I highly suggest you purchase a stand. Or at least a piece of Styrofoam that you can put your sticks in… Wait, Styrofoam is bad for the environment, so I take that back, you must buy a stand. I know you’re probably going to think that I’m pushing my Amazon products at you, but these really are what I use. And the sticks especially are the only ones I like and the only ones that work. I do own the Bakelicious cake pop stand as you saw in the video, but I also have some others, so find one you like! Also, if you don’t have or can’t find piping bags, you can use a Ziploc bag. You won’t have as much control, but it will do!
How To Make Cake Pops
I highly recommend you skip this part and watch my YouTube tutorial, but if you’re the type who likes to read, here you are!
1. Bake a 9 x 13 pan of cake. Let it cool, cut it up and crumble it very finely in a large bowl.
2. Make some buttercream or buy some from the store and add to your crumbled cake. You want to mix in just enough frosting so that your mixture feels like Play-Doh. It is better to start with less rather than more or your cake pops with be to malleable.
3. Roll your cake mixture into individual, bite-sized balls.
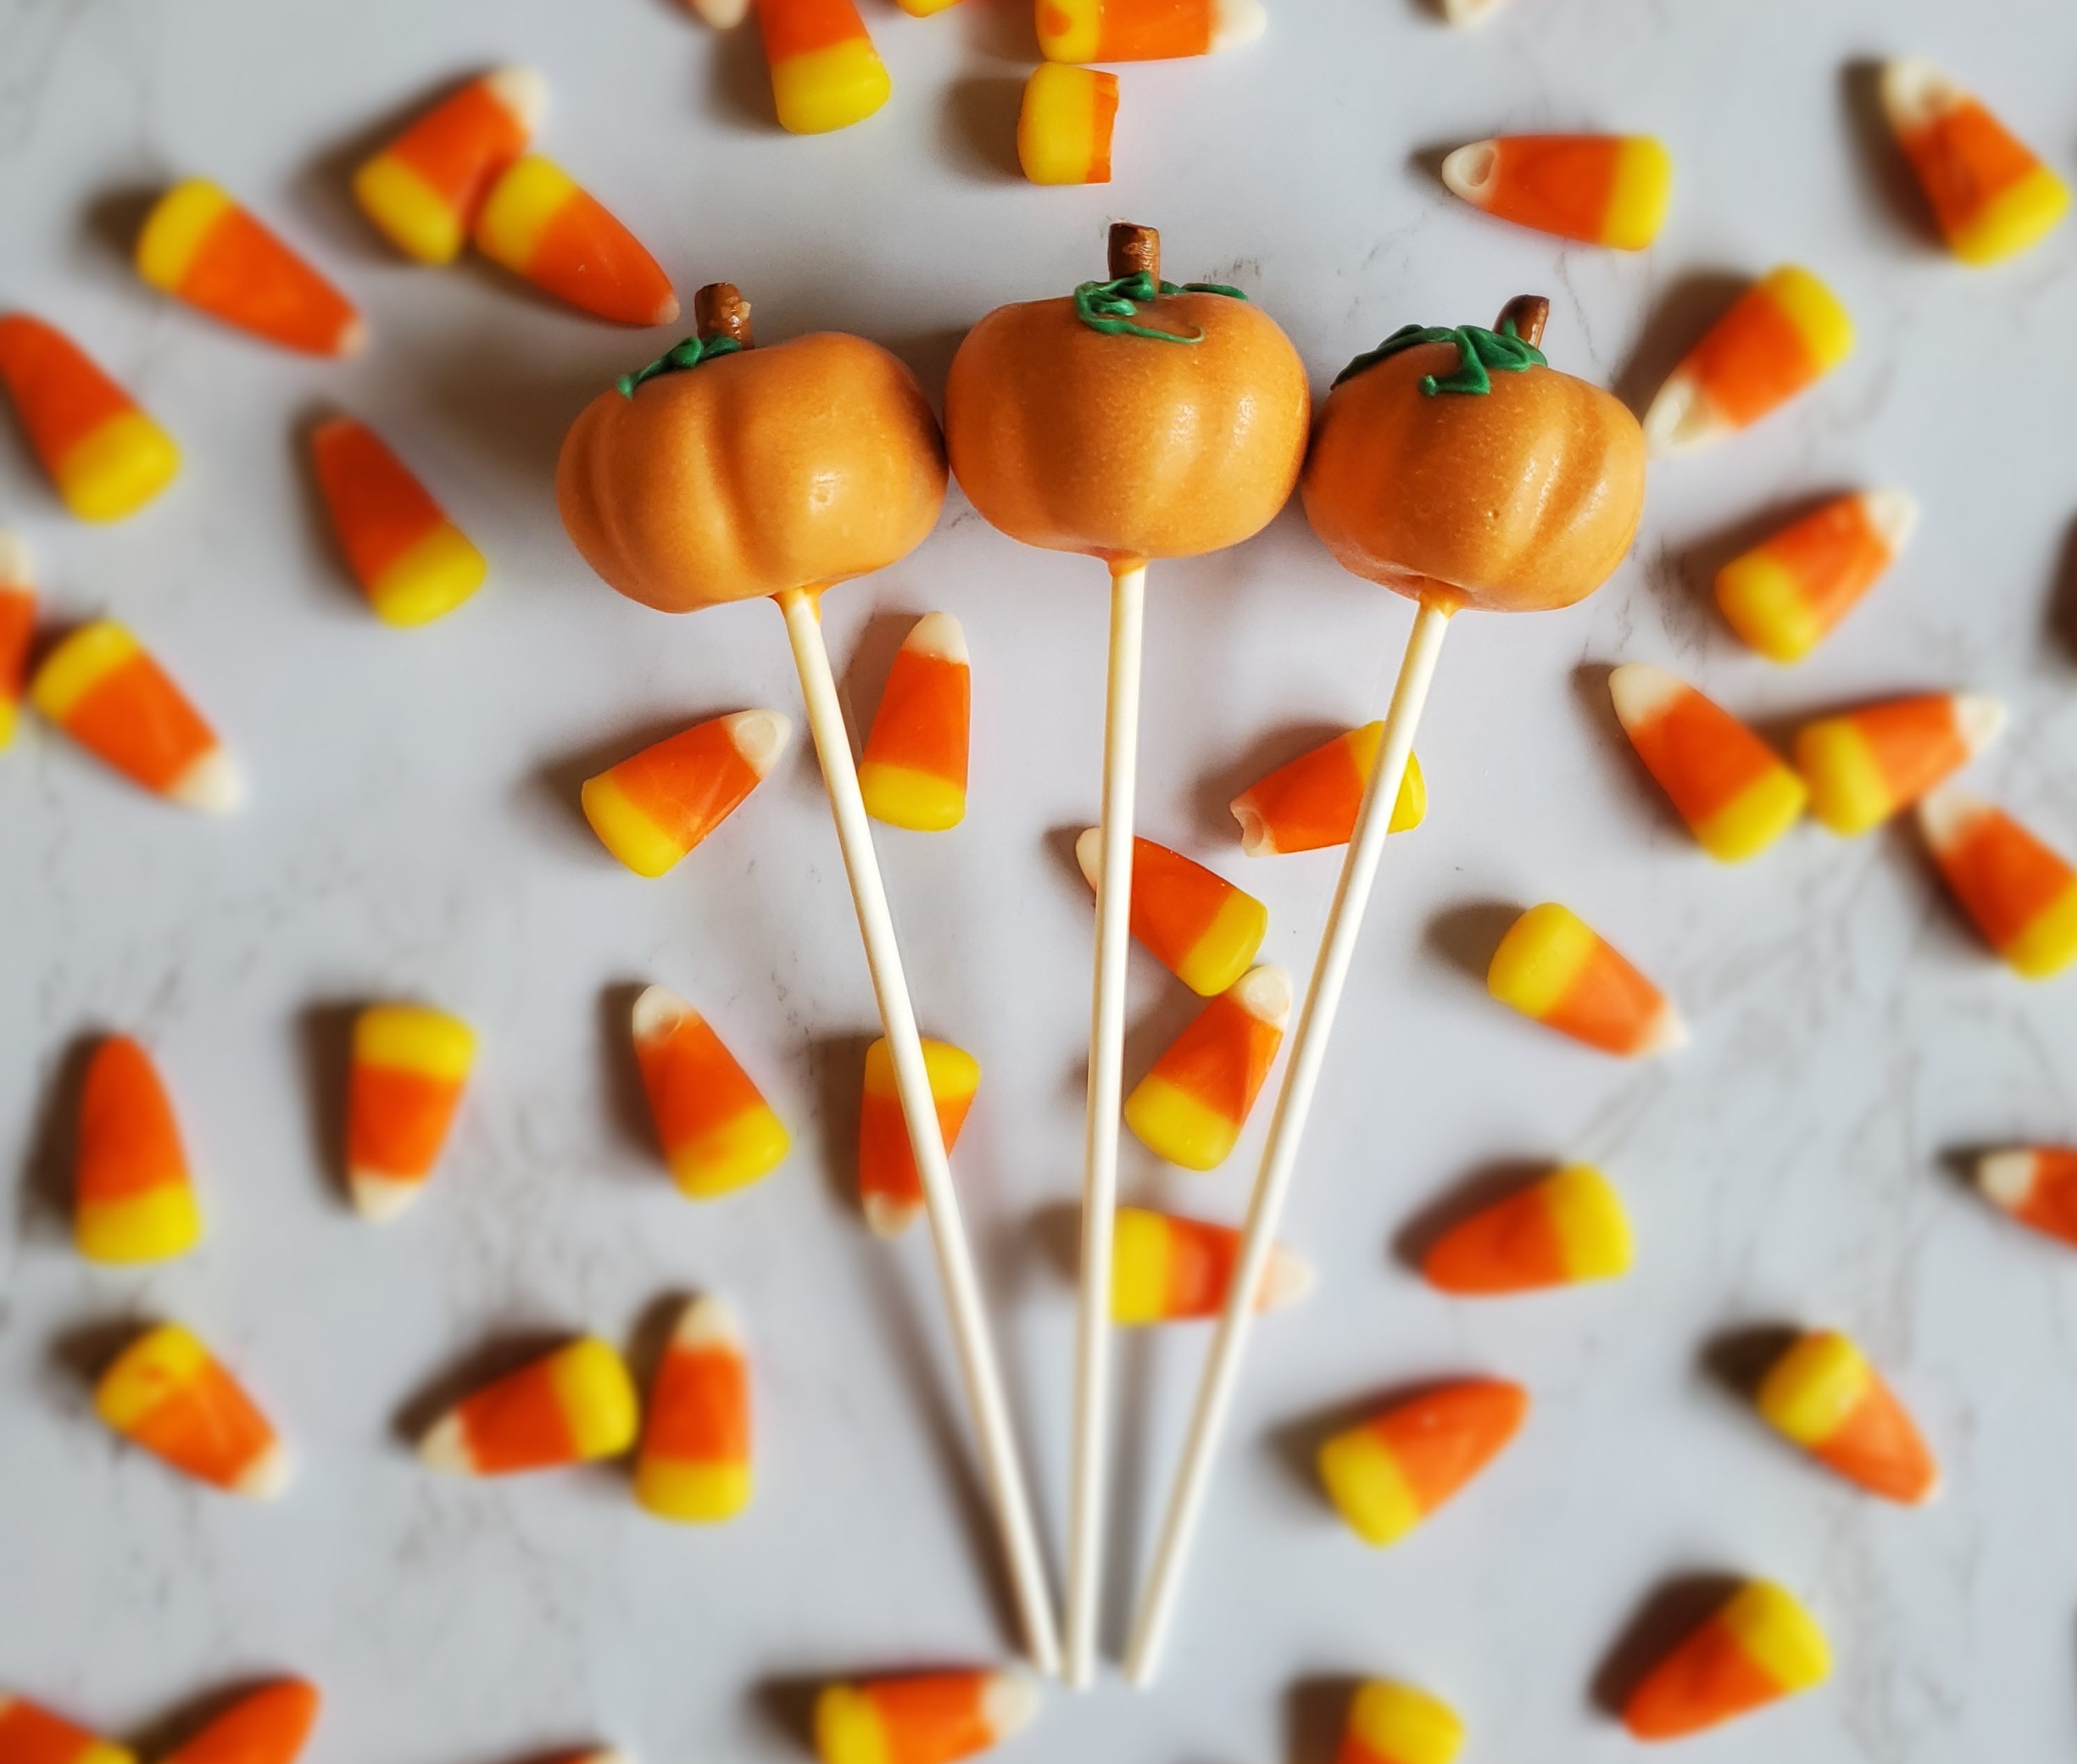
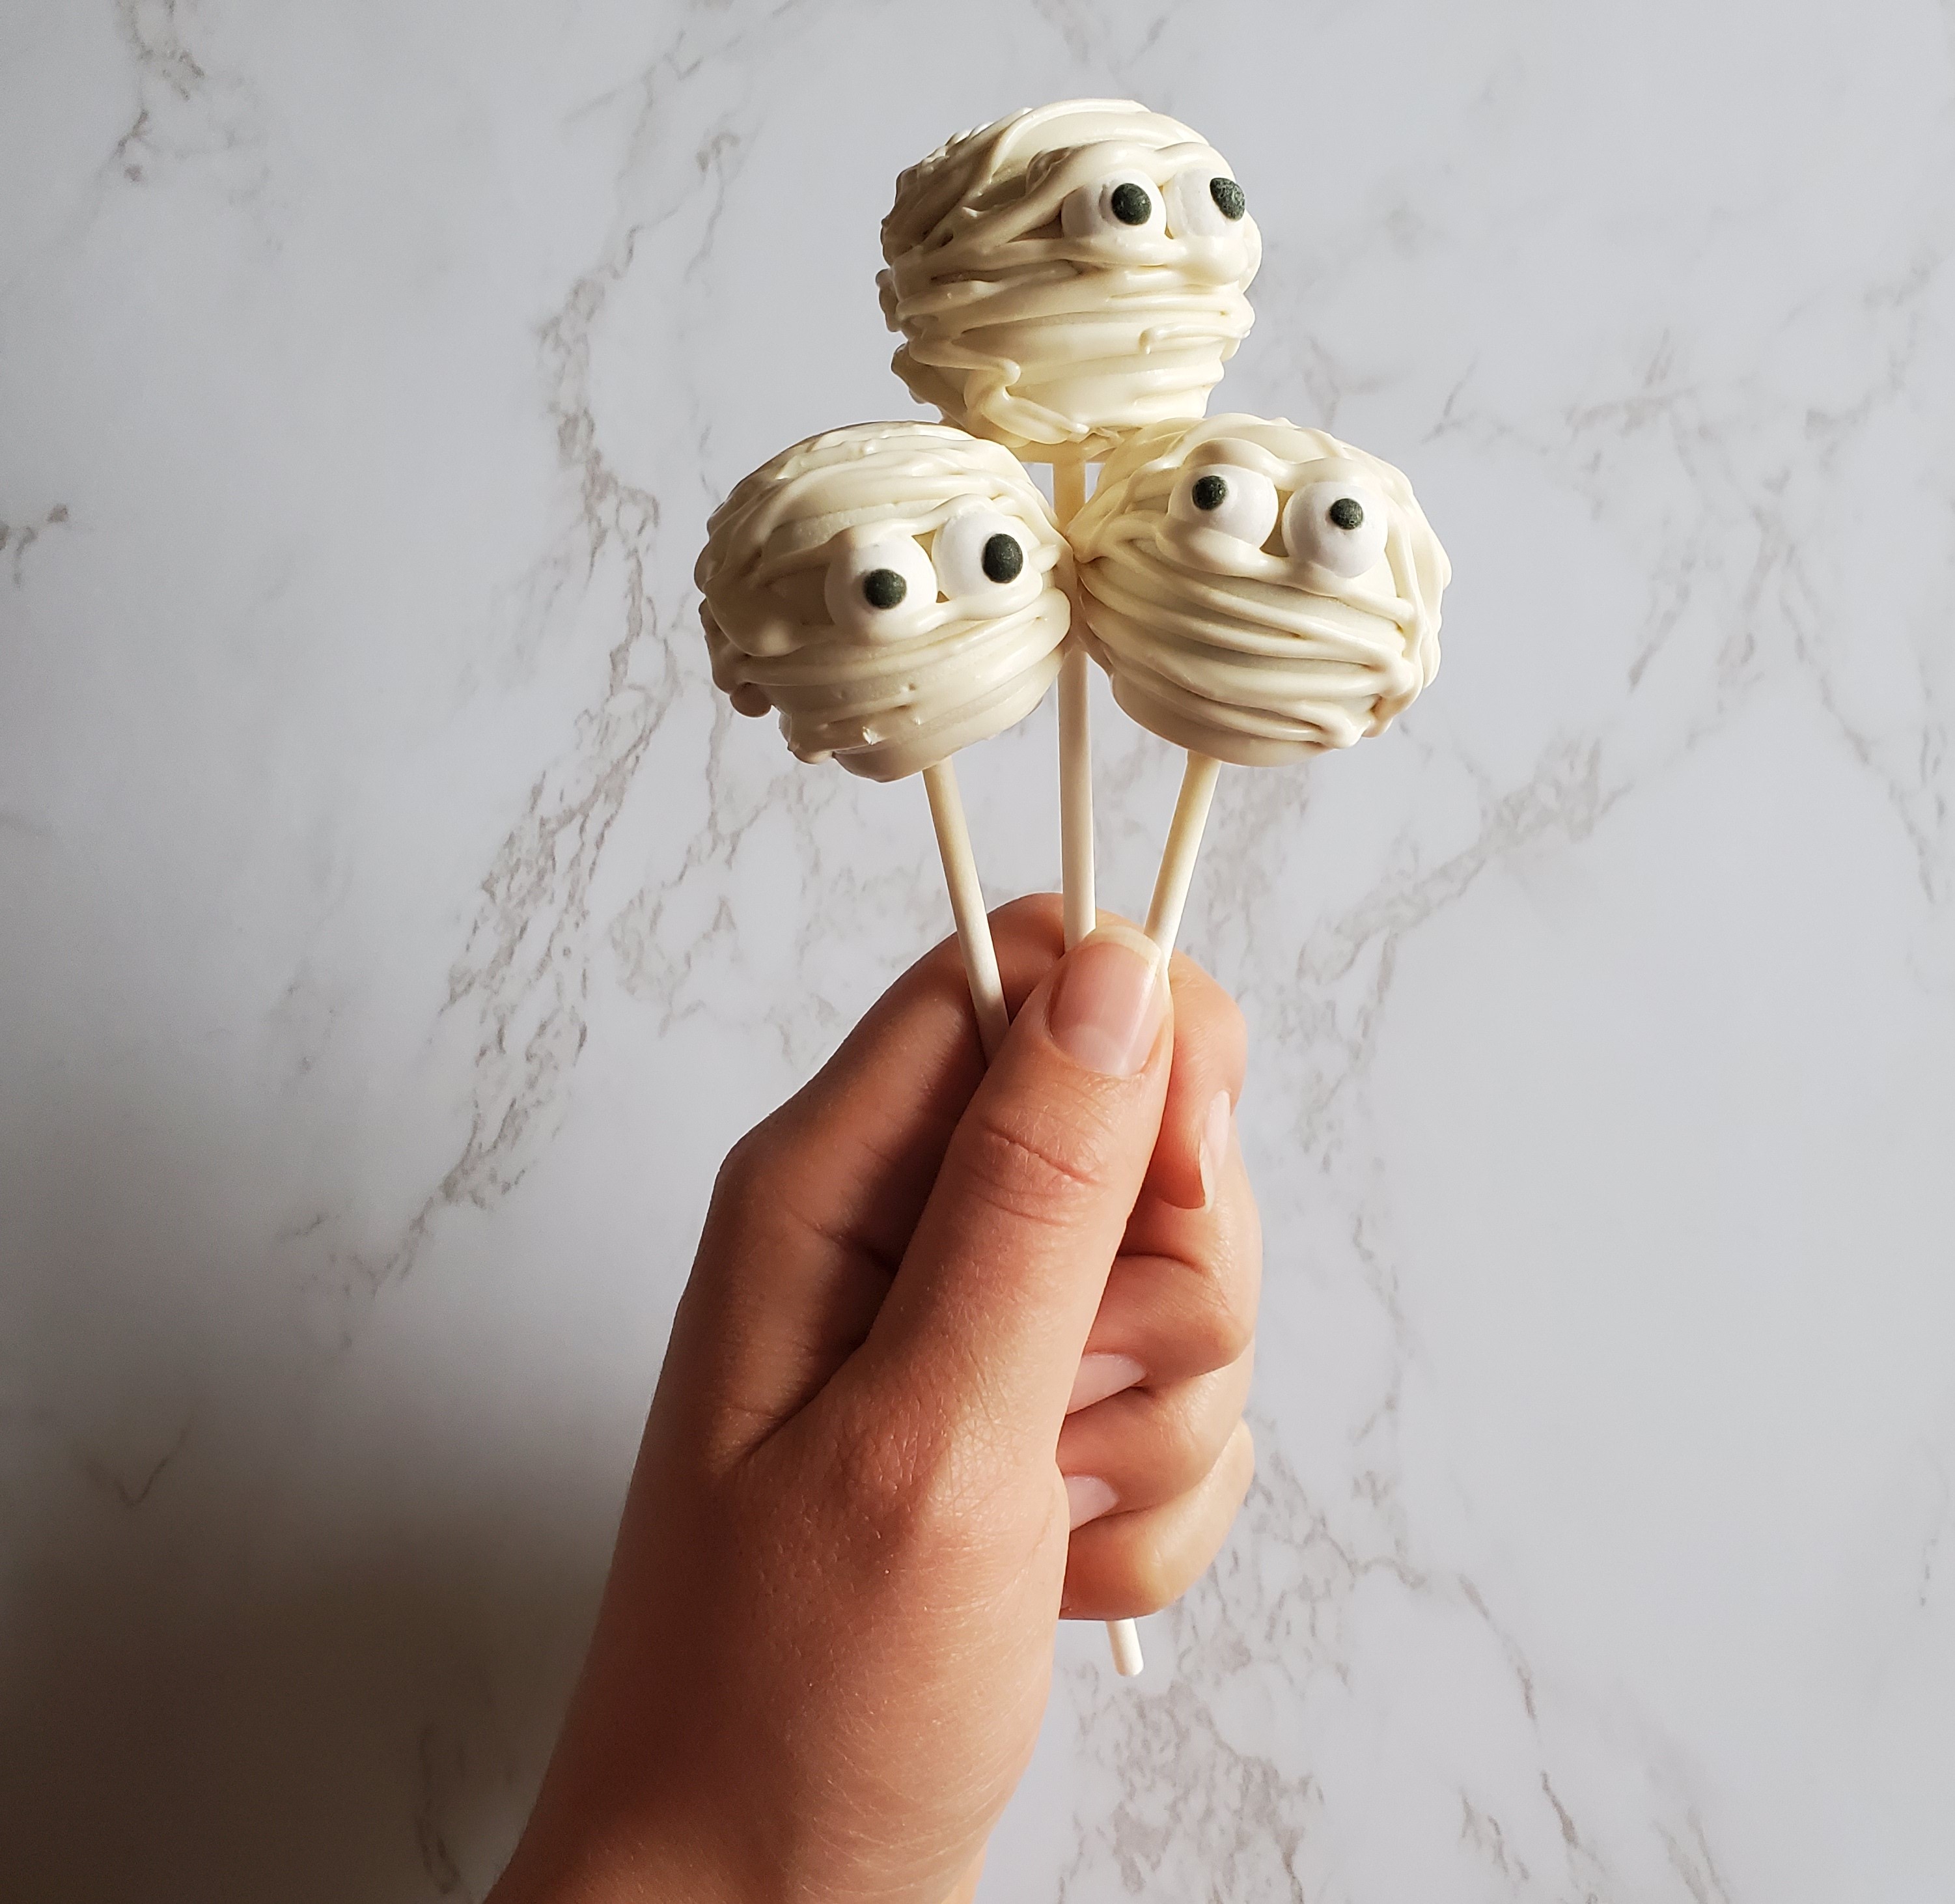
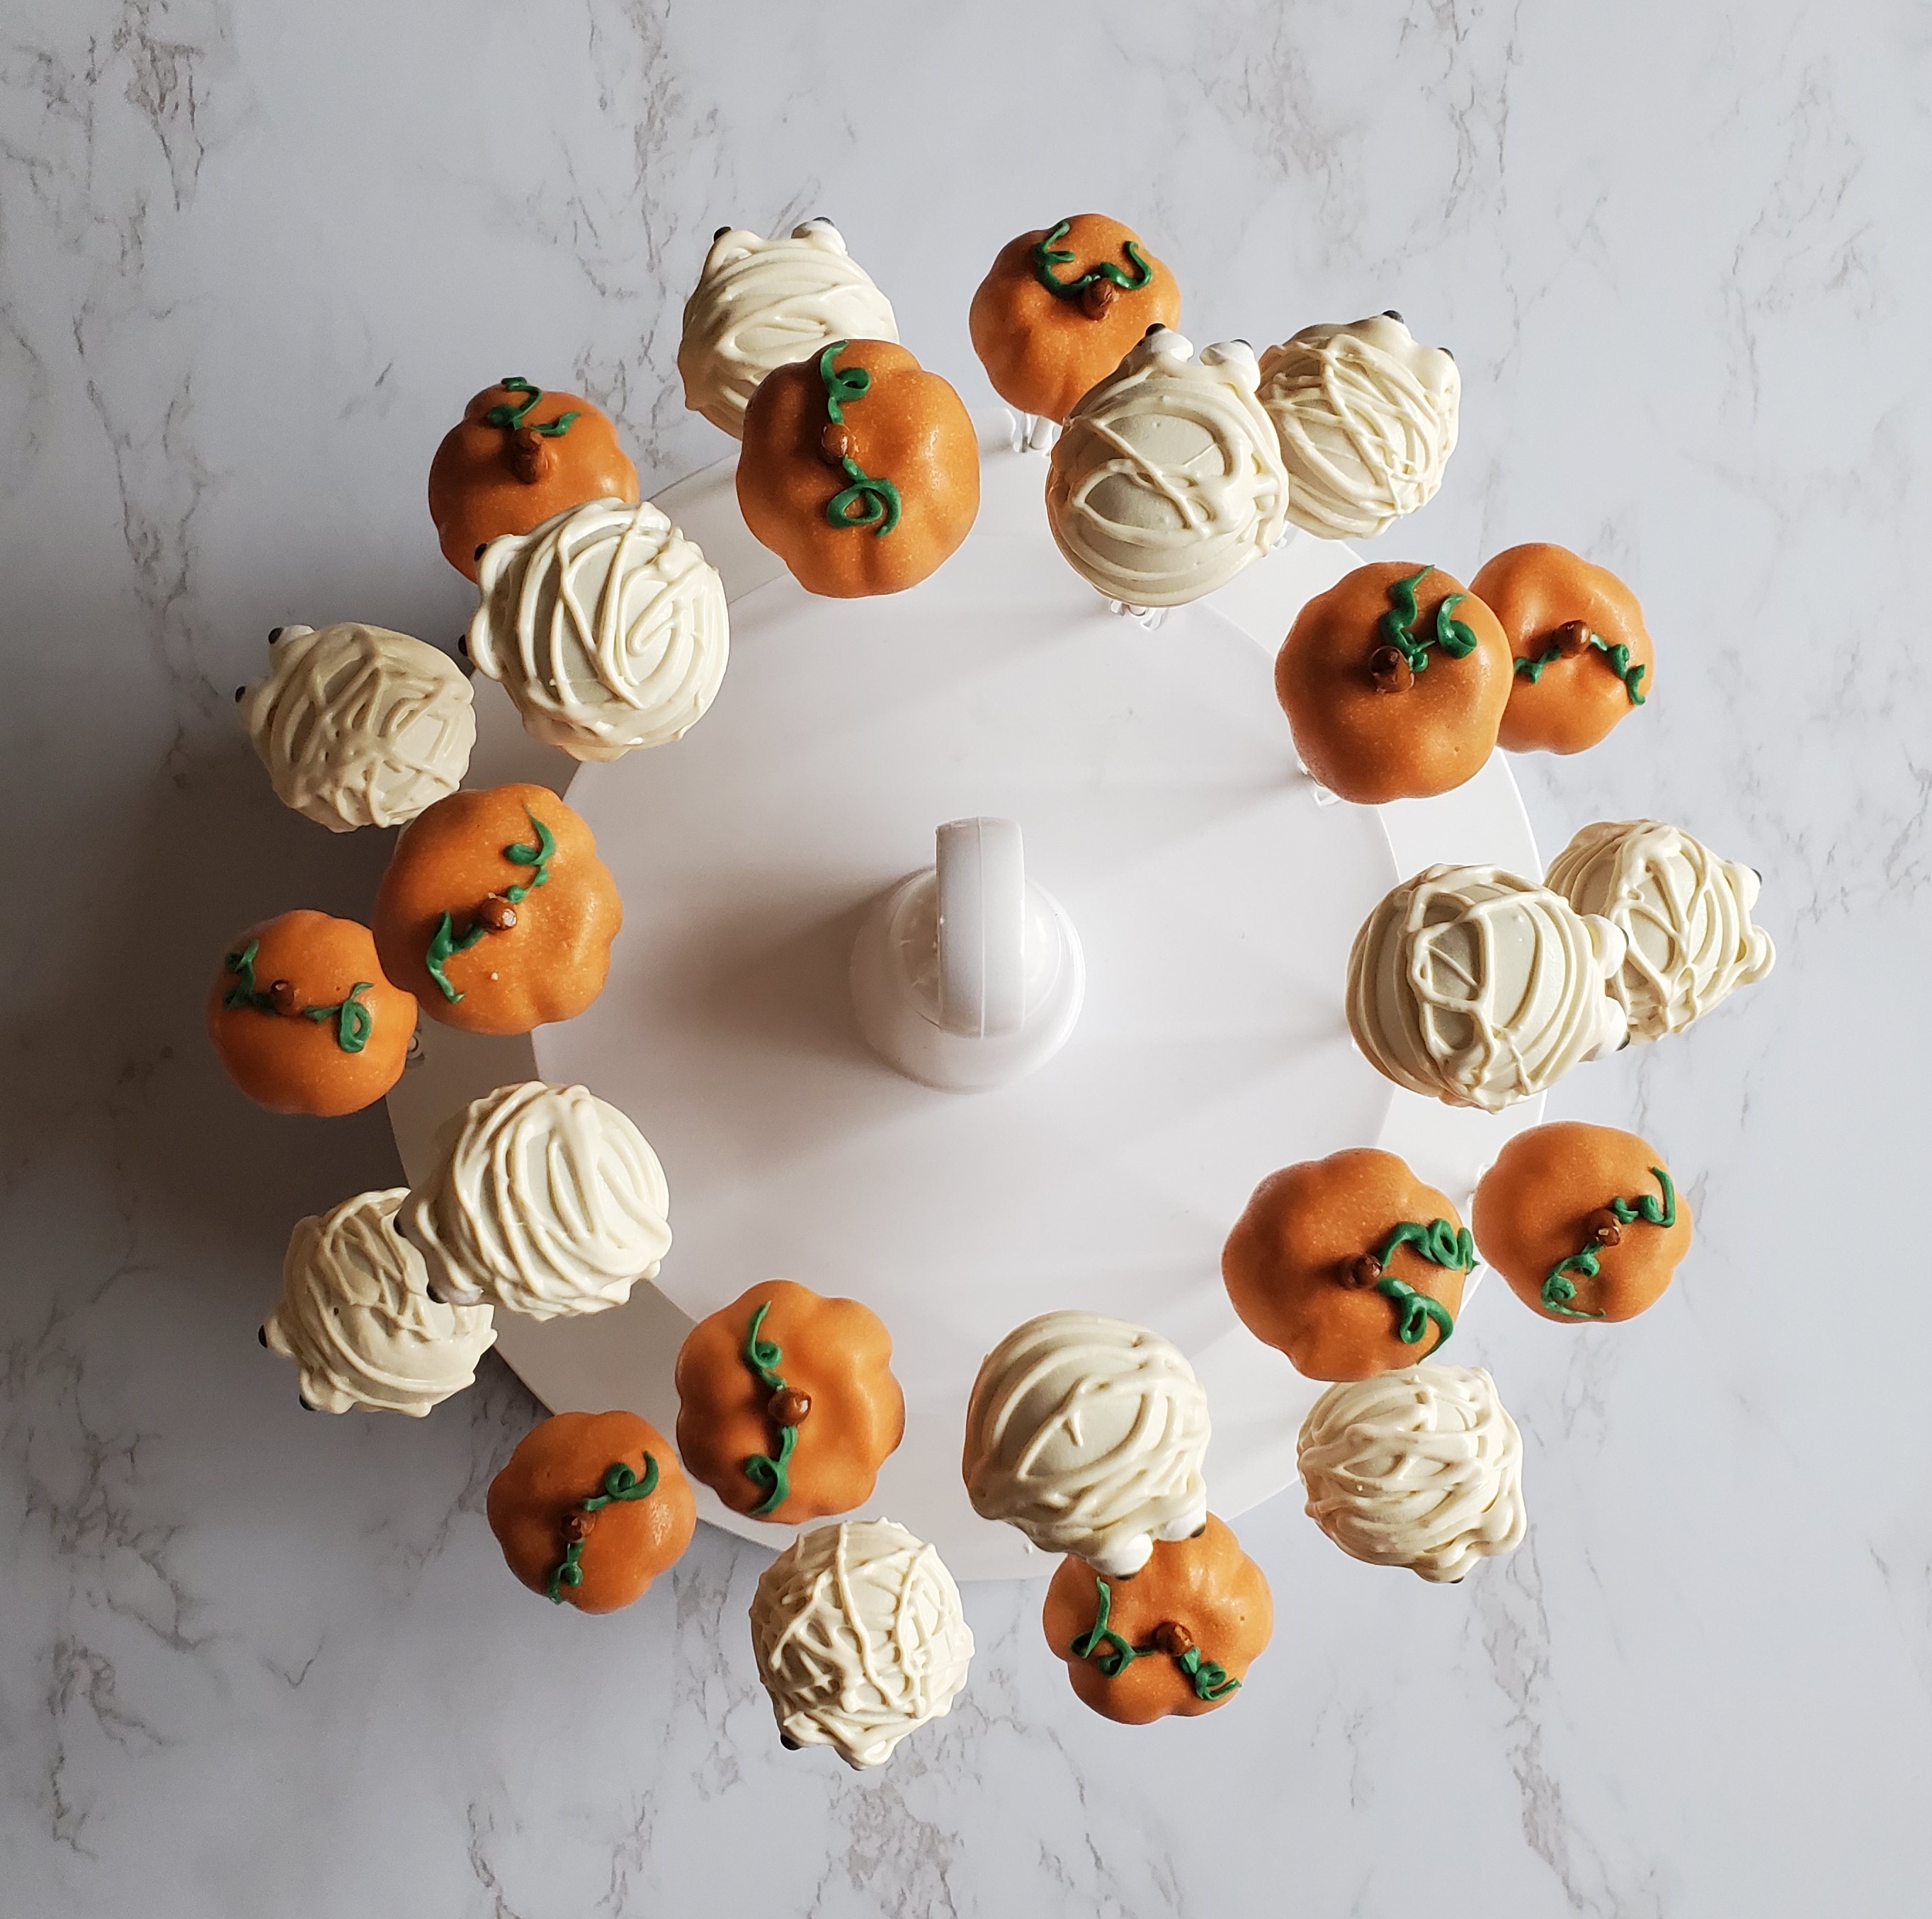
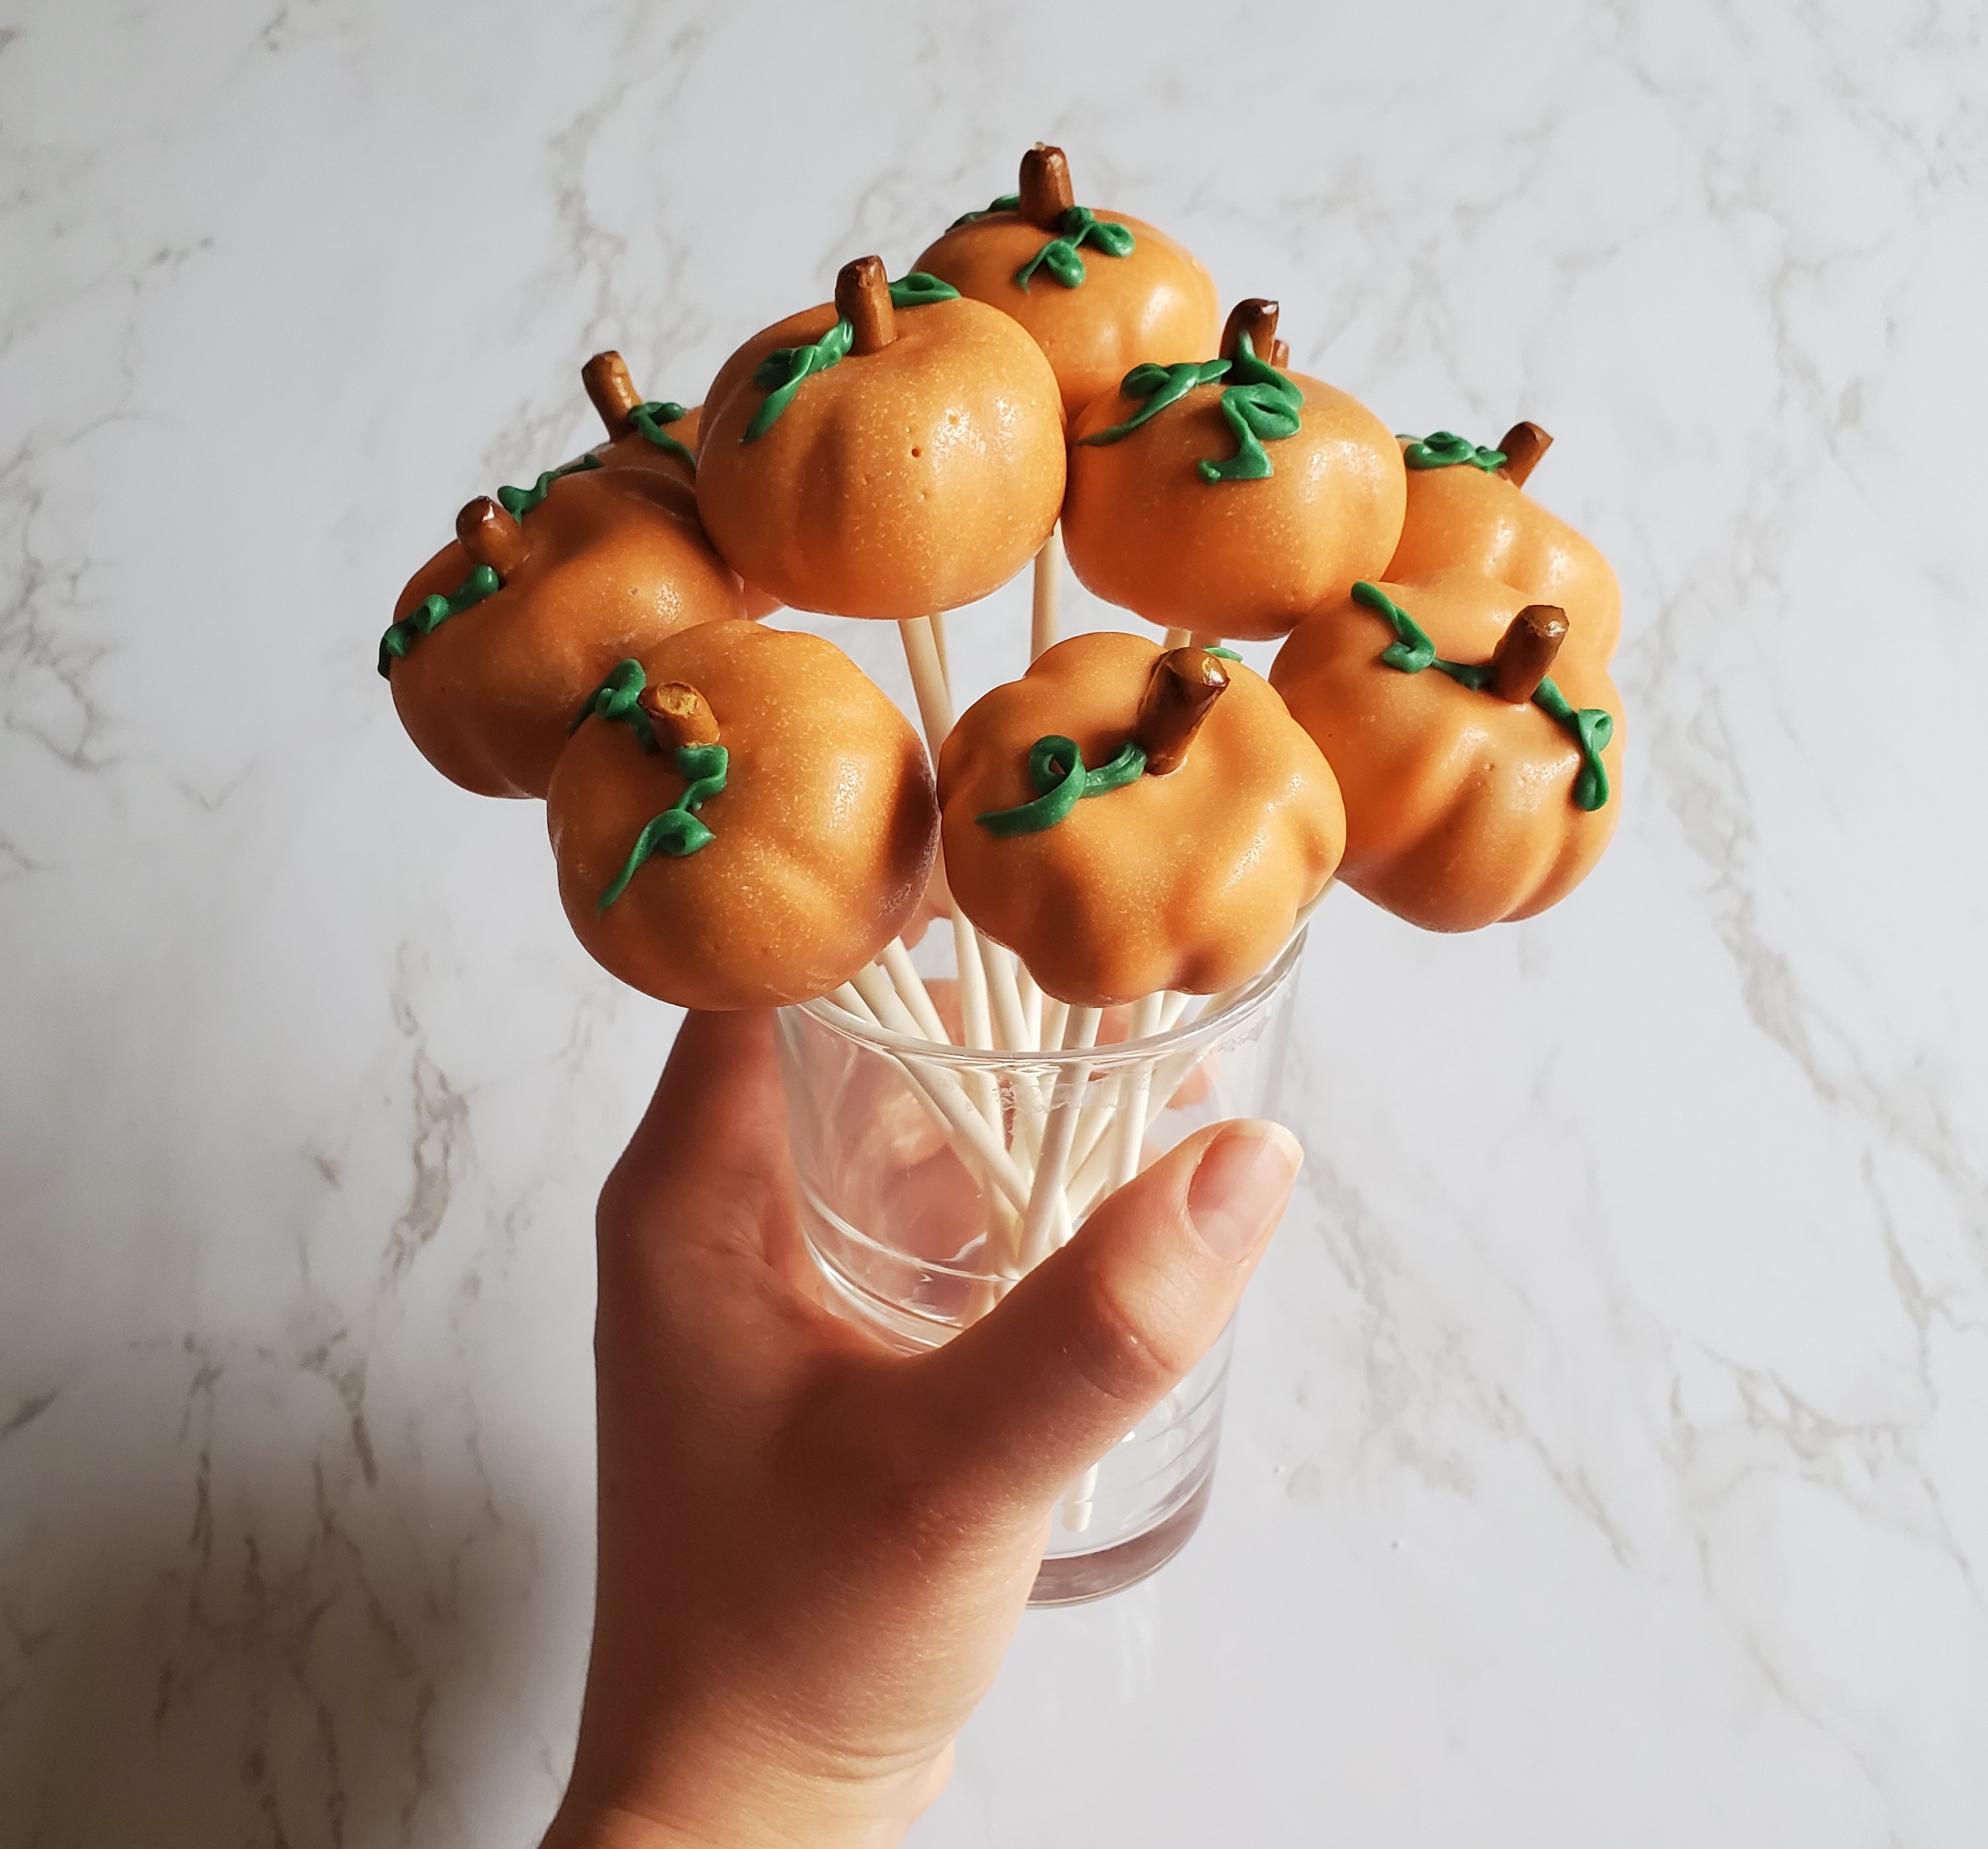
4. To make pumpkin cake pops, press down on the top of your cake ball and make divots around the sides of the cake ball using the side of a cake pop stick. Leave the balls round if you are making mummies.
5. Melt down a bag of candy melts. Orange for pumpkins, or white for mummies.
6. Dip about 1 cm of the cake pop stick into the candy melts and then stick it into your cake ball. Smooth the excess out around the base of the stick. Refrigerate your pops for 30 minutes.
7. After your cake pops have set in the refrigerator, you are going to completely submerge your cake pop in the candy melts. Be careful not to jerk it around too fast or the cake ball could fall of the stick or get crumbs in your candy melts. If you are making a pumpkin cake pop, make sure to break of the tip of a pretzel stick and place it on top immediately after dipping.
8. Next melt a small bowl of green candy melts. Put this into a piping bag and clip off the tiny bit at the end to pipe a vine on your pumpkin.
9. If you are making a mummy. Simply take whatever leftover white candy melts you have, put them into a piping bag, and clip the end. Then you can either pipe two dots directly onto the cake pop to stick your candy eyeballs on with. Or you can squeeze out a mound of melted candy and dip the eyes in like glue before sticking them to your cake pop.
10. Finally, for the mummies, just drizzle your candy melts crisscross to created the “wrapped” look.
Here's What You Will Need:
As an Amazon associate, I earn from qualifying purchases.
Wilton Cake Pop Sticks 6 in. 100 ct
Wilton Candy Eyeballs Assorted Halloween 3 pack
Wilton 12 in. 100ct, Reusable Piping Bags
Simple Mills Organic Vanilla Frosting
*Buy a boxed cake mix, or make your own!
I hope you’re able to make & share these with your loved ones this Halloween. Leave questions below and comment what you’re doing for Halloween this year, even if that means getting dressed up & watching movies at home!
happy eating!
Lauren
Comments
The cake pops are adorable! I was trying to remember if the very first ones you made were for Tim's 40th or if you had made them before? Those were the only ones I ever made. LOL! Happy Halloween!